 English
 Español
 عربى
Engineered specifically for harsh environmental conditions, the Weatherproof Outdoor GRC door and wi...
READ MOREOct 16, 2026
Content
Channel Drainage Specification
The Drainage Channel End Outlet: The Smallest Component That Decides the Whole Run
A trench drain is only as good as the point where it stops. Here is how to size, seal and set the end outlet so water leaves the channel instead of sitting in it.
A 90 m run of 100 mm resin channel on a distribution centre apron was laid straight, set to a clean 1:100 fall and grouted flush with the asphalt. Six weeks after the first autumn storm, water stood 40 mm deep at the upstream end. The channel was fine. The drainage channel end outlet — a DN110 spigot pushed into a pipe socket and packed with mortar — sat 25 mm above the channel invert, and the mortar collar had cracked in the first frost.
That failure was decided on paper, not on site. The end outlet costs a fraction of the channel it terminates, yet it carries three of the highest-risk decisions in the run: the bore that must pass the design flow, the invert level that must not trap water, and the seal that must keep bedding and soil out of the pipe.
The short answer first: specify the termination before you specify the channel. Five decisions cover most projects — termination type, outlet bore, invert level, jointing method, and the load class at the discharge point.
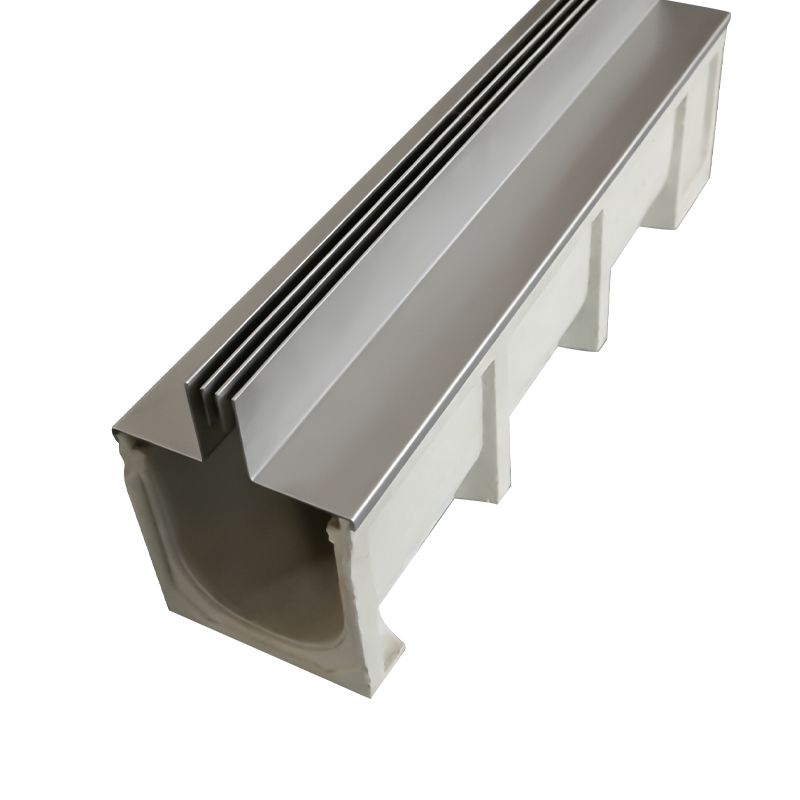
A channel body is a rectangular or U-shaped profile; the pipe it discharges into is circular. The end outlet is the moulded or cast fitting that joins the two, and it does three jobs at once.
Because the outlet fixes the top water level of the run, it also fixes how much of the channel depth is usable. A fitting that takes twenty minutes to position deserves more attention than the grate above it.
Not every channel end should discharge into a pipe. The first question is what the downstream end is for.
| Termination | What it does | Typical setting | Failure if wrong or missing |
|---|---|---|---|
| Blank end cap | Closes the profile with no discharge | Dead ends, staged construction, future connection points | Silt and standing water collect; the last section becomes a sump |
| Plain end outlet | Moulded spigot or socket converting the channel to a pipe bore | Standard outfall to a gully, carrier pipe or soakaway | Ponding if the invert is high; wash-out of bedding if unsealed |
| Outlet with backflow flap | Allows one-way discharge only | Outfalls near tidal water, rivers or surcharged sewers | Receiving water flows back and floods the paved surface |
| Outlet with debris screen | Retains leaves, litter and rodents while discharging | Outfalls to ditches, open water and planted areas | Pipe and soakaway block within one or two seasons |
Bore size follows the flow, not the channel width, although the two usually track each other closely.
Invert level matters more than bore. Set the outlet invert flush with, or 0 to 5 mm below, the channel base invert. Anything above that becomes a permanent puddle: on a 200 mm deep channel, a 25 mm step costs roughly 12 percent of the usable depth before flow even starts.
A 25 mm step at the outlet is not a small tolerance error. It is a sump with a lid on it.
On a 40 m run at 1:100 there is 400 mm of fall available. Spread it along the channel; a single 200 mm drop at the end is a sump, not a fall.
Water that escapes at the outlet does not simply leak. It washes fines out of the bedding, and the paving above settles within a season. Match the jointing method to the ground conditions, not to what is in the van.
Watch outMortar, expanding foam and mastic are not seals. All three shrink or crack within a season and none of them tolerate movement. If the joint is the only barrier between groundwater and the pipe, use a gasket or a banded flexible coupling and keep the mortar for support.
Sequence matters as much as the parts themselves. A step-by-step channel drainage installation guide is worth reading before the first section is bedded, because bedding, jointing and testing have to happen in that order.
End outlets are normally supplied in the same material as the channel, and it is worth insisting on that: mixing materials introduces a different rate of thermal expansion exactly where water is concentrated.
Load class is where specifications quietly fail. Under EN 1433, channel systems are classified from A15 up to F900, and the outlet, its frame and the surrounding bedding must carry the same class as the adjacent grate. The riskiest point is usually the transition from paving to soft landscape, where an A15 outlet sits beside a C250 grate and fails first under a delivery vehicle. Standard resin channel runs cover most commercial and landscape configurations without custom moulds.
A well-set outlet can still be let down by a poor outfall. Three rules cover most sites: discharge above the normal water level of the receiving system, and preferably above its design flood level; protect the outfall with riprap or a concrete apron so the discharge does not erode the bank; and fit a flap valve wherever the receiving water can surcharge, such as tidal outfalls or combined sewers.
Design checkIf the outfall sits below the flood level of the receiving water, the channel becomes a storage tank. Plan for a backflow flap, a pumped discharge, or a secondary outfall at a higher level.
Freeze depth matters too. An outlet discharging onto a slope in a cold climate will ice over at the pipe mouth, and the channel behind it will fill on the next thaw.
Testing an outlet takes ten minutes and saves a season of callbacks.
Good practiceA bucket of water poured in at the upstream end tells you more than any visual inspection: if the water disappears at the joint rather than at the outfall, the ground around the pipe is being washed out.
The uncomfortable truth about channel drainage is that the visible parts attract the attention and the buried parts take the blame. The end outlet is where the two meet, and its failure cannot be hidden: water appears where it should not be, paving settles, and the repair bill is measured in excavation rather than in parts.
Specify the termination early, set the invert low enough, seal it flexibly, and protect the outfall. That is a better return than any upgrade to the grate above it.
Related Products
Engineered specifically for harsh environmental conditions, the Weatherproof Outdoor GRC door and wi...
READ MOREEngineered specifically for harsh environmental conditions, the Weatherproof Outdoor GRC door and wi...
READ MOREEngineered specifically for harsh environmental conditions, the Weatherproof Outdoor GRC door and wi...
READ MOREEngineered specifically for harsh environmental conditions, the Weatherproof Outdoor GRC door and wi...
READ MOREEngineered specifically for harsh environmental conditions, the Weatherproof Outdoor GRC door and wi...
READ MOREEngineered specifically for harsh environmental conditions, the Weatherproof Outdoor GRC door and wi...
READ MORE
Contact us
Factory Address
Group 12, Quanxin Village, Donghai Town, Qidong City, Nantong City, Jiangsu Province, China
phone
+86-13914963840
+86-13451754670
products
QR CODE
 Wholesale Drainage Ditch Manufacturers